Finishing Your Wood Frame: How to Get Precise Dust Cover Edges in Seconds
When it comes to custom wood framing, there’s an important finishing touch to complete your treatment and protect your framed art or photography. It’s the application of a dust cover—a process made immensely easier, faster, and more precise when you have the right tool at your disposal.
What is a dust cover?
A dust cover is a methodically cut sheet of Kraft paper or acid-free backing paper used to cover the back of a custom wood frame, preventing bugs, dust, and other debris from getting anywhere near your work. It also helps to stabilize the level of humidity inside your wood frame, which can be negatively impacted by moisture.
When applied correctly, a dust cover effectively seals the backside of a wood frame, protecting the work from damaging particles and adding a professional flair to the finished treatment.

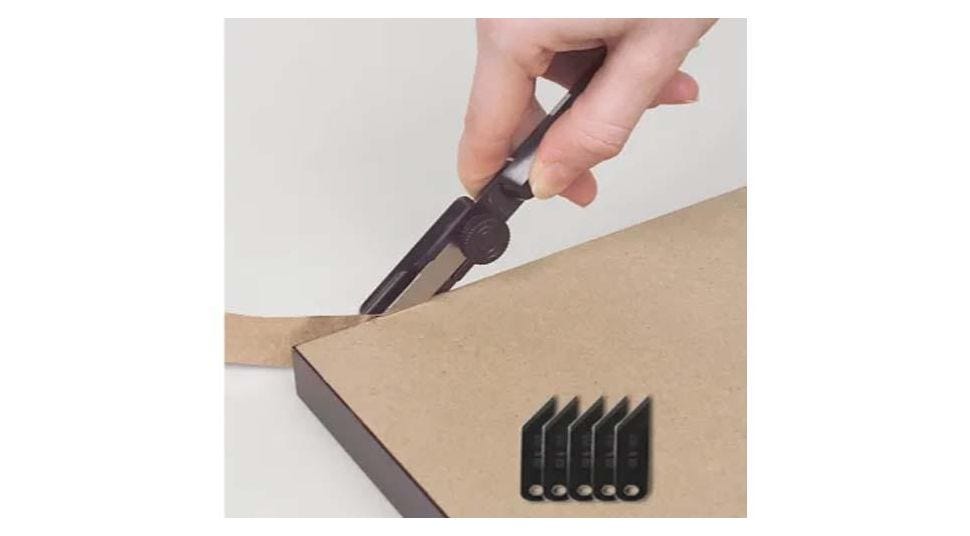
A dust cover trimmer in use
Why use a dust cover trimmer?
Without the right implement, trimming your dust cover can become a less-than-ideal experience resulting in jagged edges or excess paper. This is likely to compromise the overall look of your custom framed piece. By employing a dust cover trimmer, you can alleviate this hassle and achieve precise edges in mere seconds.
American Frame offers a dust cover trimmer that makes easy work of this effort, allowing for a polished, professional finish that safeguards your custom framed piece from dust and other adverse elements. It features a guide that glides along the edge of the frame, ensuring a perfect cut every time.
This trimmer is reversible, making it a fitting solution for both right and left-handed framers. We include five blades with the product, and additional refills can be purchased here.

A dust cover trimmer
What steps are involved in trimming a dust cover?
With our dust cover trimmer at your fingertips, the steps to complete the trimming process precisely and effectively are simple:
- Apply a strip of adhesive transfer tape to the back lip of your wood frame, all the way around the perimeter.
- Flip the frame over onto a piece of kraft or acid-free backing paper that is slightly larger than the frame, and press down firmly to ensure the paper sticks to the tape.
- Flip the frame back over again, and align the dust cover trimmer with the edge of the frame.
- Draw the tool down each side to cut off the excess paper.
The dust cover trimmer automatically cuts the paper slightly on the inside of the frame’s edge so that none of it will be seen when viewing from the side or front. This is an outcome you’d have to manually manage yourself if you were using a regular blade.
Upon completing the process with the dust cover trimmer, the end result is a precise trim in just seconds, giving your DIY custom wood framing project added protection and the most professional look possible.
Have additional questions about applying a dust cover, using the dust cover trimmer or other custom framing issues? Our framing experts are just a call away.