11 Custom Framing Ideas for Your Next Showpiece
Every work of art or photography deserves a framing treatment that speaks to its value, character and distinction, but traditional frame applications aren’t the only way to go. With so many creative ideas out there, there’s no reason why you can’t explore the possibilities. Following are some fresh and inspiring ways to leverage custom framing options to elevate and reflect the uniqueness of your next showpiece.
1. Float your artwork.
Canvas float frames are aptly named for the space or “float” between the art and the inside edge of the frame, which gives the art a recessed perspective. This frame treatment attaches to the canvas from the back (instead of covering part of the artwork with a lip on the front), allowing 100% of the artwork to be visible to the viewer.
Canvas float frames are often seen in contemporary settings because of the sophisticated and graceful separation between the frame and its surroundings. Our Silver Canvas Float Frame, for example, is a stylish option for original paintings or prints on stretched canvas, exuding a modern, streamlined appearance. Note that float frames are intended for stretched canvas pieces only.
To achieve a similar “floating” look for a work on paper, consider adding some spacers in order to float the piece on the matboard. This is a particularly ideal technique for works that feature a deckled edge. You can actually float a piece with or without a mat, depending on the aesthetic you’re seeking.
2. Try a double or deep-ply mat.
A mat board creates that nice separation between your art and the acrylic while providing a visual transition between the art and the frame. And when it comes to mat boards, you have options—like using two at once. Many watercolorists apply this technique. Think about adding depth, definition and/or a pop of color to your frame treatment with a double mat combination. Or opt for a deep mat in six- or eight-ply, creating a notable thickness and depth for a sophisticated look. Either option can take your art to the next level, supporting a more elevated and professional appearance.

A large drop-bottom mat treatment makes a small image feel larger.
3. Apply a drop bottom.
If you have an expansive space to fill or want to maximize a smaller piece, a wide mat with a large drop-bottom frame is a very modern and popular aesthetic. With this type of treatment, the top and side borders are even, while the bottom is deeper. Use just a slightly longer bottom (like a ¼ inch) to visually center the artwork.
The drop bottom technique is often used in galleries, and it’s especially attractive for cases in which the artwork’s focal point is in the lower half. This style is also advantageous because it accommodates the artist's signature.
4. Play with proportions.
You can alter the sizing of a piece by playing with the frame or mat board’s proportions. Consider, for instance, how much impact you might bring to a small piece of artwork by adding 6-inch borders. Doing so would demand more wall space and attention. You could even take an oblong piece and make it a square (or lengthier oblong) simply by adjusting the frame and mat. A larger frame can stretch out a piece, and a deeper one can help add more substance.

Circle cut mat boards give these portraits an old-fashioned feel. We then added a multi-cut mat on top to combine the photographs into one frame.
5. Go for a circle cut.
Squares and rectangles may be common for most framing treatments, but certain types of art lend themselves better to a circle cut. Wedding photographs and portraits often fit this option well. A circle cut can infuse an old-fashioned look in some pieces (think: old portraits hung in oval shapes).

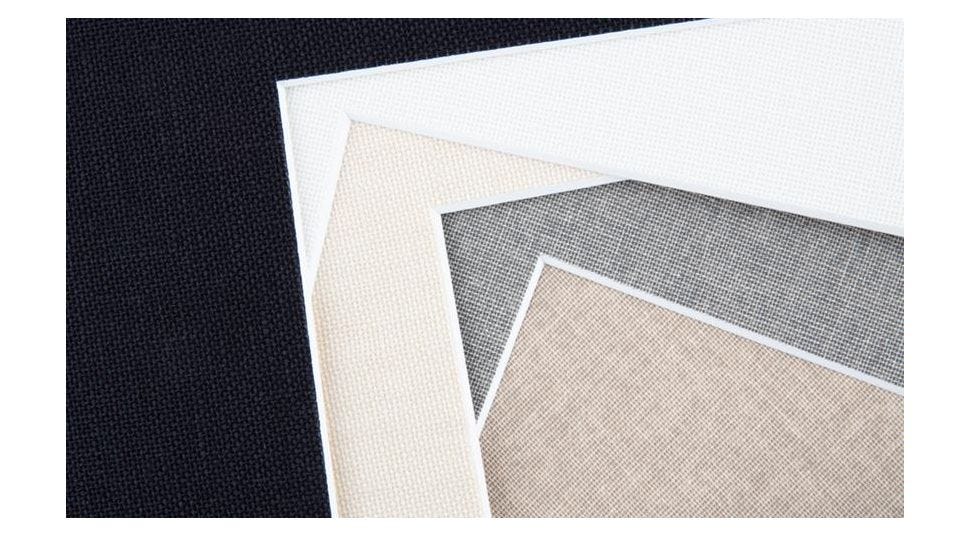
Our collection of linen mat boards which add texture and interest to your custom frame treatment.
6. Tinker with texture.
A linen mat can add subtle texture to your artwork or photography. In fact, American Frame offers an entire collection of strong, durable and beautiful linen mats from Bainbridge and Crescent. Alternatively, you could opt for a metal frame with a brushed or linen textured finish, and there are even some wood frames with texture to them as well.
7. Employ color.
When it comes to color, frames run the full gamut, supporting seemingly endless possibilities. The colors you choose for your framing treatment affect the way your artwork is perceived. Black frames, for example, are sophisticated, while wood tones add warmth to a picture. Silvers and golds exude dressy or casual elegance, and lighter frames give your art the impression of floating on a wall.
You can leverage color in your framing choices to accent or highlight a particular area of interest in your piece. Different color variations also work well for children’s artwork, bright photographs and concert photographs. You might even play with color on a double mat application.
8. Explore materials.
The material of your frame plays a part in the overall appearance, and you can try different options for different aesthetics. When it comes to natural hardwood frames, there’s no cookie-cutter product. Each one is unique, featuring individual characteristics from grain to coloring. If you’re seeking a uniform look, select a matte finish for either a wood or metal frame.
Take time to explore different styles: There’s everything from bamboo to rustics. Examine the style characteristics in the context of your showpiece. Plain and boxy treatments with matte finishes are sleek and modern, but there are so many opportunities to go beyond that.
9. Emphasize depth and dimension.
To add depth and dimension to a piece, there’s an option to use acrylic spacers, or ¼- to 1-inch deep acrylic placed between the artwork and the exterior acrylic. This is an especially handy option for pieces that have a significant amount of texture, as it prevents the acrylic from smashing up against the work. It can also be ideal for mixed media pieces, like those involving beading. In general, acrylic spacers support a modern aesthetic for your art or photography.
10. Imbue shine.
For an element of luxury and shine in your framing treatment, opt for jewel-tone colors, jewel-like metals or palettes of gold, silver and bronze. All of these add a lustrous appearance and can even give your piece a retro feel.
11. Mat with a black core.
Typically associated with white mat boards, a black core adds an extra pop of color around a piece. This treatment is especially well suited to charcoal or black-and-white photographs, providing another element of style. The window is cut on a bevel so you can see the core, and while most mats do this with a white core, the black option can create distinction and interest. Gray is another really subtle option for introducing a non-white core into the matting.
Get creative with these varied custom framing options, and take advantage of the opportunity to access free samples. Nothing supports a vision better than having sample material right at your fingertips. If you’d like additional support from an expert to make your vision a reality, be sure to use our personalized custom frame consultation.
